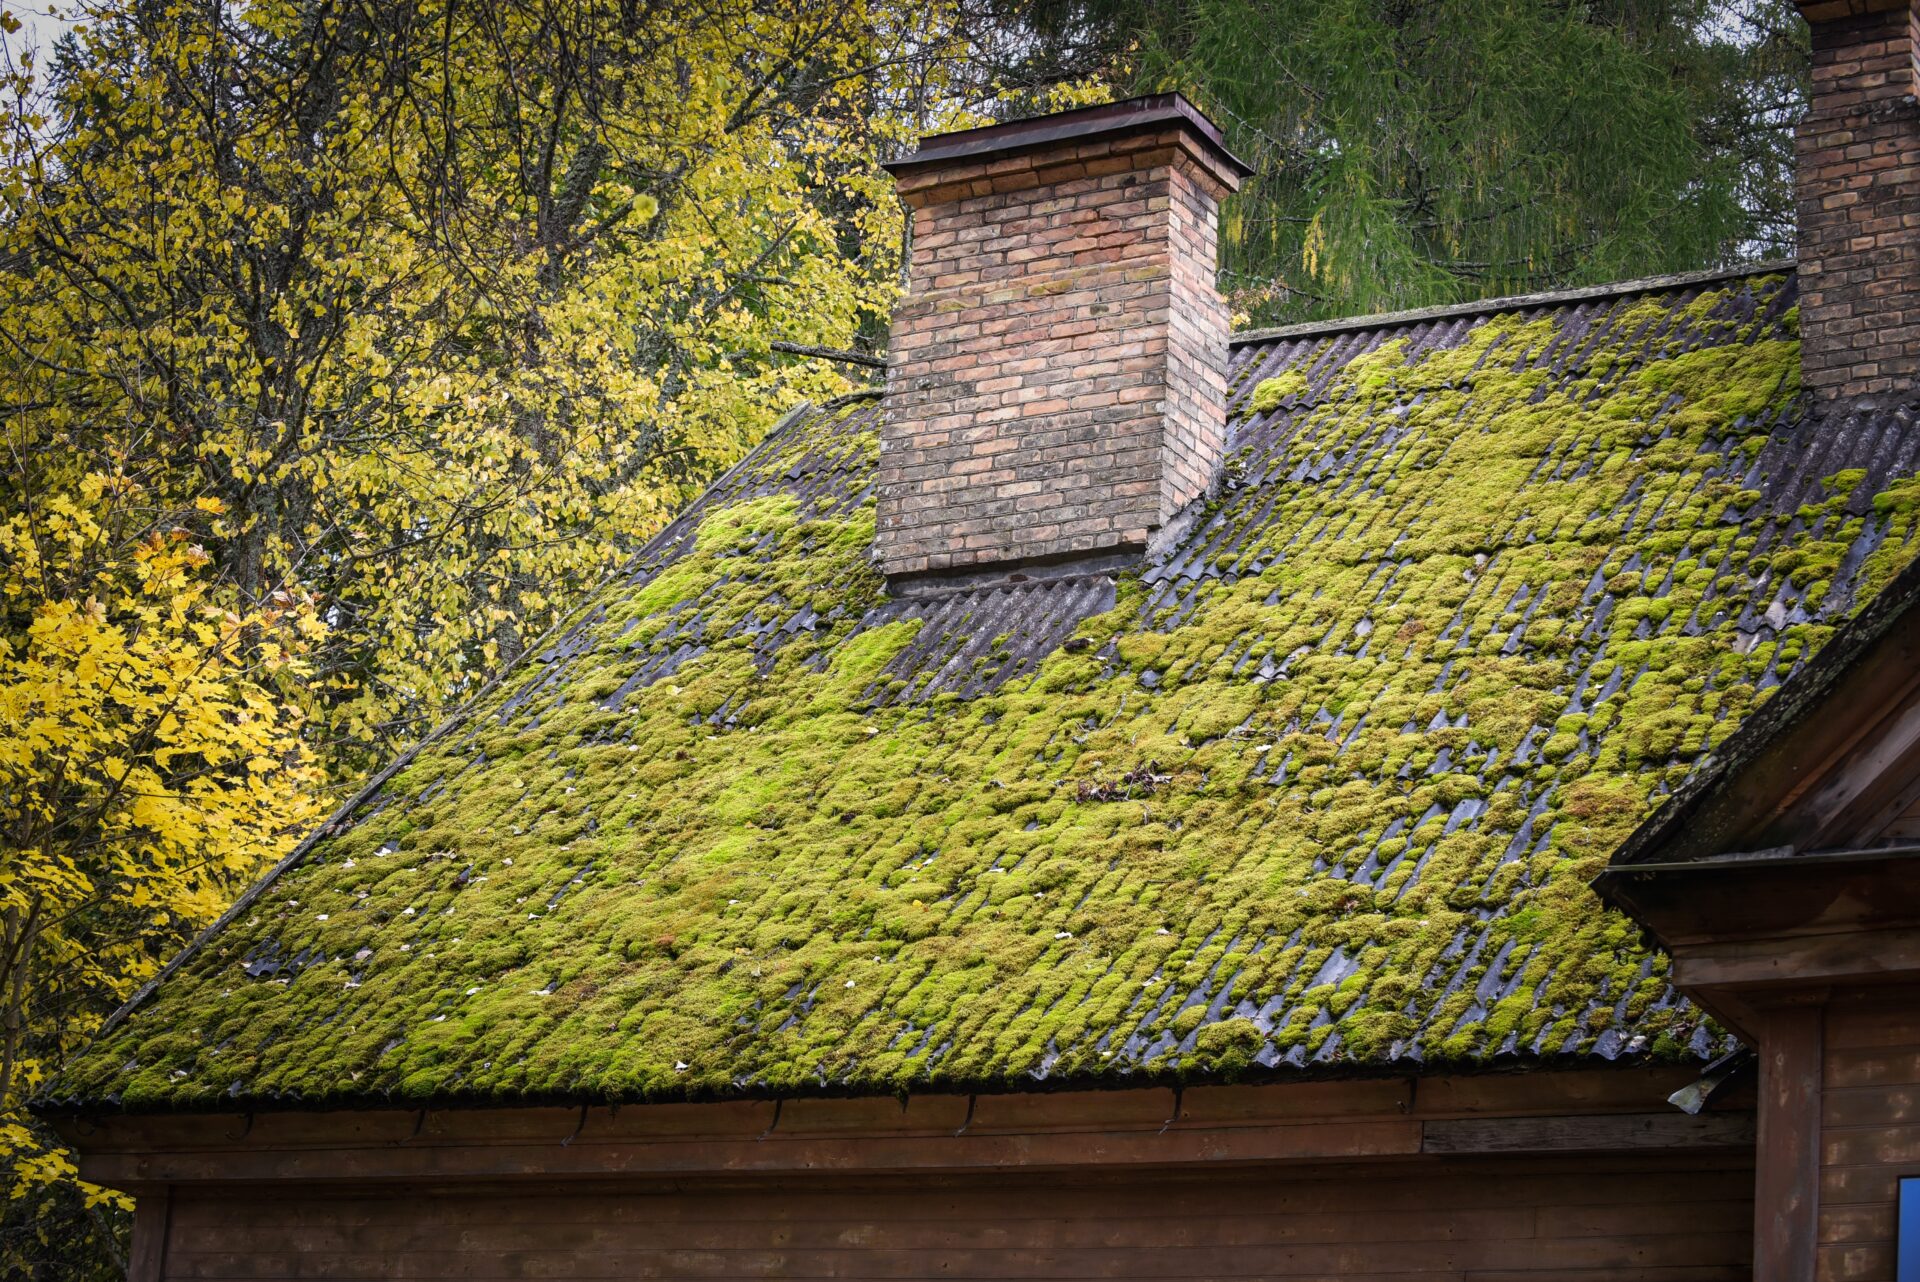
How to Eliminate Moss on Your Roof: A Step-by-Step Guide
Moist, mild winters and frequent rainfall make Metro Vancouver a paradise for gardeners—and, unfortunately, for roof moss. Those soft green clumps look harmless at first, yet they shorten the life of shingles, invite leaks, and can even void a roofing warranty. This 1 200-word guide breaks down why moss loves West Coast roofs, explains how to get rid of it safely, and offers practical tips to keep it from coming back.

What Causes Moss to Grow on Your Roof?
Moss requires three basic conditions: moisture, shade, and a rough surface where its tiny rhizoids can cling. Coastal B.C. supplies those in abundance.
1. Moisture-Retaining Conditions
Continuous drizzle, lingering morning dew, and dense tree canopies keep shingles damp far longer than roof manufacturers intend. When moisture lingers for 24 hours or more, the first microscopic moss spores can germinate and spread.
2. North-Facing Slopes and Poor Sunlight Exposure
In the Northern Hemisphere, north-facing roof planes receive the least direct sun. Add a few towering cedars or maples, and the shingles may stay wet all day. Limited sunlight is a leading cause of moss on roof surfaces in Greater Vancouver and one big reason why moss grows on the roof of otherwise well-built homes.
3. Organic Material Build-Up
Needles, leaves, and twigs trap water and provide nutrients. As debris piles up, it forms a soggy mat, giving new spores a perfectly cushioned nursery. Over time, that mat can lift shingle edges and block drainage paths.
4. Underlying Drainage Issues or Aging Shingles
Clogged gutters, missing flashing, and cracked asphalt granules allow water to pool. Old fiberglass shingles also lose their gritty surface, becoming rougher—and easier—for moss to grip.

How to Get Rid of Moss on Roof: Step-by-Step
A. Manual Removal
- Put Safety First
- Work on a cool, dry morning when the roof is least slippery.
- Wear soft-soled shoes or boots, eye protection, cut-resistant gloves, and a CSA-approved harness if the pitch is steep.
- Always have a partner steady the ladder and act as a spotter.
- Work on a cool, dry morning when the roof is least slippery.
- Choose Gentle Tools
- Use a long-handled soft brush, a rubber-edged roof rake, or a plastic leaf blower attachment.
- Start at the ridge and pull downward with light pressure. Scrubbing across or upward can break shingle seals.
- Never use a pressure washer; the high-velocity spray strips protective granules and forces water under the shingles.
- Use a long-handled soft brush, a rubber-edged roof rake, or a plastic leaf blower attachment.
- Remove Debris
- Gather loose clumps and dispose of them in yard waste bags—don’t leave them on the lawn, where spores can spread to patios and walkways.
- Sweep or blow off remaining bits, paying close attention to valleys and behind chimneys.
- Gather loose clumps and dispose of them in yard waste bags—don’t leave them on the lawn, where spores can spread to patios and walkways.

B. Apply Moss Killer or Moss Removal Spray
Once the bulk of the growth is gone, treat the leftover roots:
- Select an Appropriate Product
- Zinc sulfate: sold as powder or liquid; effective and budget-friendly.
- Potassium salts of fatty acids: biodegradable, less corrosive around plants, and permitted in most municipalities. Both are marketed as moss on roof spray or granular moss killer.
- Zinc sulfate: sold as powder or liquid; effective and budget-friendly.
- Check Local Regulations
- Some Lower Mainland communities restrict certain chemicals near storm drains. Confirm with your city’s environmental office before you buy.
- Some Lower Mainland communities restrict certain chemicals near storm drains. Confirm with your city’s environmental office before you buy.
- Pick the Right Weather Window
- The best time to apply moss killer on roof surfaces is a dry, windless day in early spring or late fall when daytime highs stay above 5 °C and there’s no rain in the 24-hour forecast.
- Dry weather ensures the solution isn’t washed away, and cool temperatures slow moss metabolism, allowing the product to penetrate.
- The best time to apply moss killer on roof surfaces is a dry, windless day in early spring or late fall when daytime highs stay above 5 °C and there’s no rain in the 24-hour forecast.
- Apply Carefully
- Follow the label exactly—over-application can discolour shingles and harm nearby gardens.
- Work in sections, starting at the ridge. A pump sprayer or granule spreader offers even coverage.
- Keep children and pets off treated areas until fully dry (check the product instructions).
- Follow the label exactly—over-application can discolour shingles and harm nearby gardens.
- Let It Dwell
- Most products need 15 minutes to several hours to break down cell walls. Avoid rinsing too quickly.
- Most products need 15 minutes to several hours to break down cell walls. Avoid rinsing too quickly.
C. Rinse and Inspect
- Gentle Rinse
- Attach a garden hose to a “shower” or “soft wash” nozzle. Begin at the top and let gravity do the work.
- If the roof is steep, stay on a ladder platform and rinse from the eaves upward at a shallow angle to prevent lifting shingles.
- Attach a garden hose to a “shower” or “soft wash” nozzle. Begin at the top and let gravity do the work.
- Look for Damage
- Check for loose tabs, popped nails, and missing granules. Moss tends to exploit weak spots, so any area previously covered should get a close look.
- Inspect flashings around skylights, chimneys, and vents; moss can wedge metal joints open.
- Check for loose tabs, popped nails, and missing granules. Moss tends to exploit weak spots, so any area previously covered should get a close look.
- Plan Repairs Promptly
- Small fixes now—such as sealing exposed nail heads or replacing cracked shingles—will keep water out and discourage new moss growth.

How to Prevent Moss from Returning
Trim Overhanging Branches
Reducing shade allows sun and wind to dry the roof faster, making it harder for moss to gain a foothold.
Keep Gutters and Downspouts Clear
Free-flowing gutters prevent water from backing up under the shingle edge. Install leaf guards if nearby trees are prolific shedders.
Install Zinc or Copper Strips
Put a 5- to 8-cm wide strip just below the ridge. Rainwater carries trace metal ions down the roof, creating an inhospitable surface for moss. Replace or re-coat every five to seven years.
Schedule Annual Roof Cleaning
A light brushing each spring removes seed spores before they establish. Mark the task alongside gutter maintenance to build a consistent routine.
Address Ventilation and Insulation
Adequate attic airflow and proper R-value insulation reduce heat loss, minimizing condensation on the underside of sheathing that can seep back into shingles.
Choose Algae- and Moss-Resistant Shingles
If you’re reroofing, ask your contractor about shingles infused with copper or zinc granules. They add only a modest premium yet pay long-term dividends.
Roof moss may be a rite of passage for West Coast homeowners, but it doesn’t have to claim your shingles. By understanding why moss grows on the roof, using gentle but effective methods to remove it, and adopting smart prevention habits, you can extend your roof’s lifespan and keep your home looking tidy year-round. Consistent maintenance, a little chemistry, and respect for safety guidelines will save you thousands in premature replacement costs.
Frequently Asked Questions
What’s the best time to apply moss killer on a roof?
Choose a dry stretch in early spring or late fall, with temperatures above 5 °C and no rain for at least 24 hours. These conditions let the product stay in place long enough to penetrate the moss and work effectively.
Can moss damage my roof shingles?
Yes. Moss traps moisture against the shingle surface, loosens protective granules, and can lift shingle edges as it thickens. Over time, this accelerates rot, promotes leaks, and reduces the roof’s expected service life.
Is it safe to pressure wash moss off my roof?
Pressure washing is not recommended. The high force strips granules, voids manufacturer warranties, and can drive water under the shingles. Stick to manual brushing and targeted moss on roof spray treatments instead.